Report Data by File Upload
Upload Report Data for Single or Multiple Contracts by File Upload
You can upload your data into the FAS Sales Reporting system using an Excel spreadsheet or a Special character delimited file.
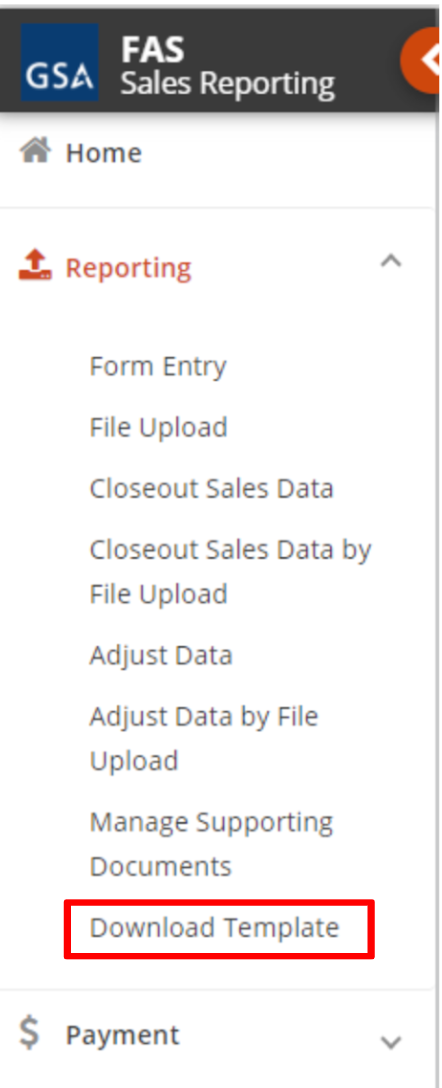
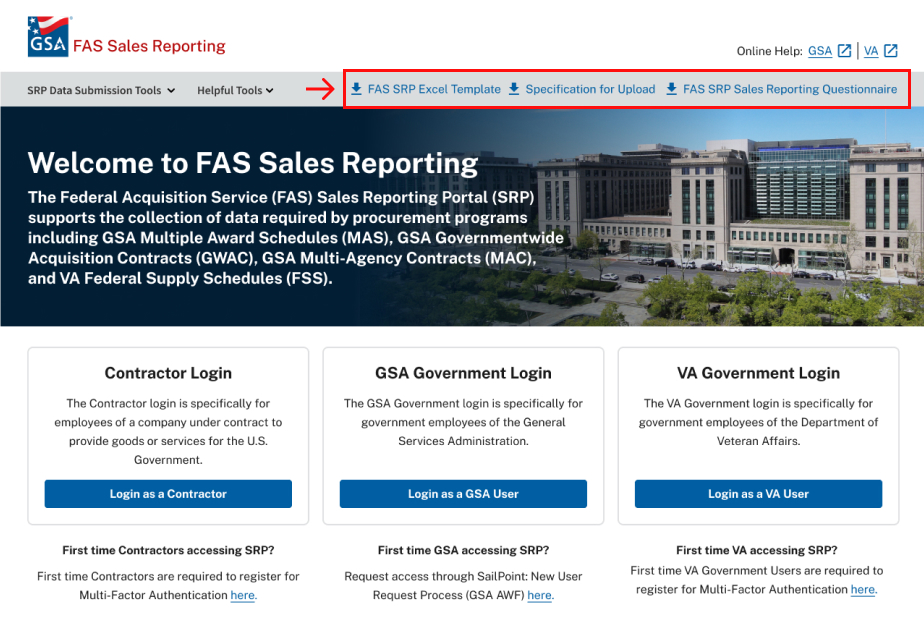
The Excel template can be downloaded from the Report Data menu by selecting Download Template or by clicking on FAS SRP Excel Template, located at the bottom of the FAS SRP portal page under the Data Submissions section. The specification for the special character delimited file (.csv) is available on the FAS SRP page.
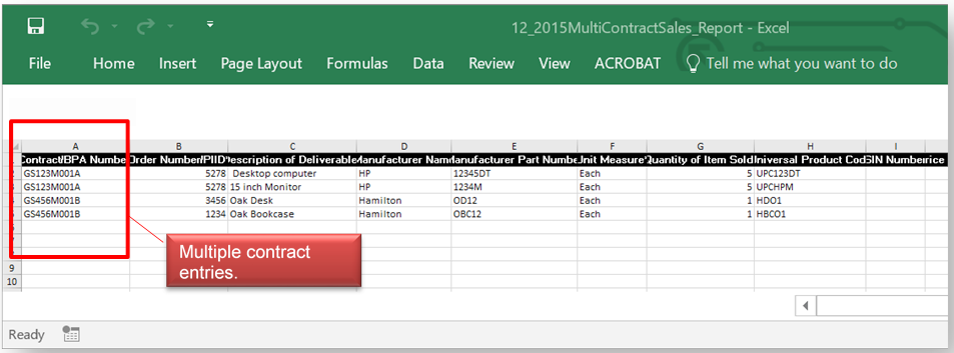
Note: If reporting multiple contracts, all contracts must be on the same Reporting Period.
The Excel template contains the same required fields as those found in the Report Data by Form Entry page. The Report Data by File Upload feature allows you to enter data for one or multiple contracts at once. The specification for the special character delimited file will be available for the line items in Column A, followed by the Order Number. You must repeat this information for each contract and order that you want to enter using the Excel template.
Note: Please choose the appropriate tab you will be reporting the contracts under:
- MAS data tab = Multiple Award Schedules
- Non-MAS data tab = Multiple Agency Contracts (MAC) Government Wide Agency Contracts (GWAC)
| Files uploaded into FAS Sales Reporting can be no more than 100 MB, or approximately 1,000,000 rows. | |
| Only the following special characters are allowed for Contract/BPA Number, Order Number/PIID, and SIN Number fields: Blank Spaces, Hyphen "-", Forward Slash "/", Period ".", Parenthesis "(" ")", and Underscore "_" | |
| When you upload a file, any adjustments made will override previously entered data. |
How to Report Data by Excel File Upload
-
Once you have downloaded the template, prepare your file upload by entering your sales data into the template and saving it on your computer with an appropriate name.
-
Click Report Data | File Upload. This page loads with all your previous uploads.
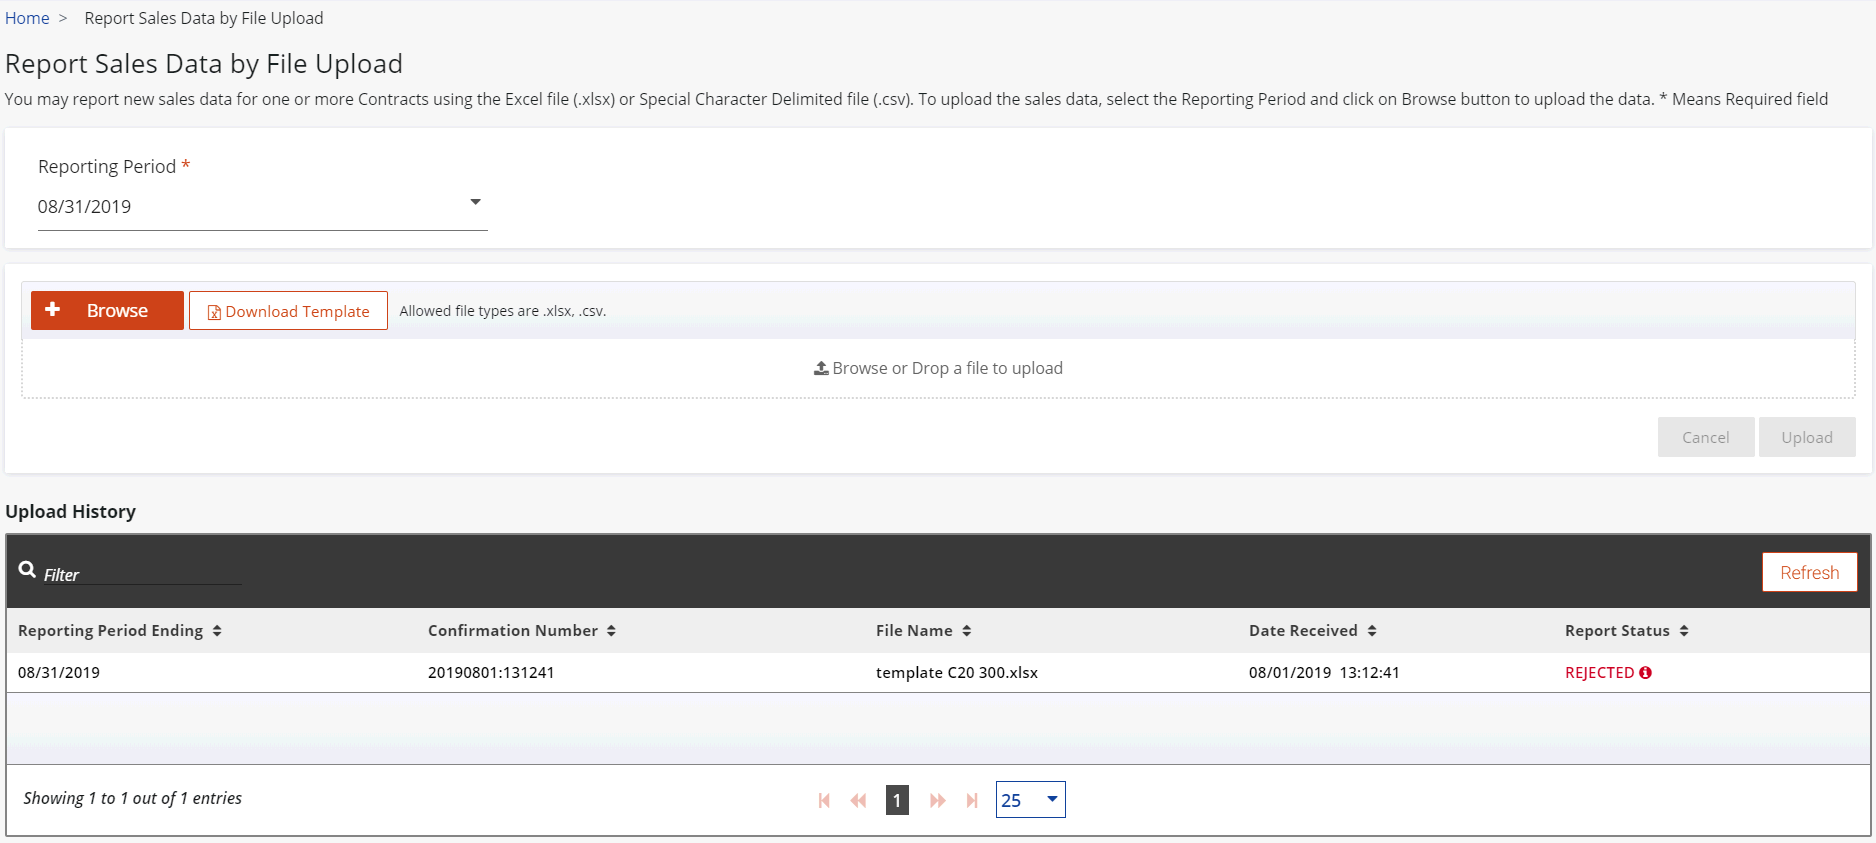
Figure 47: Upload History -
Click the down arrow to select the Reporting Period. Once the reporting period is selected the ‘browse and upload’ feature is shown on the screen. You can also download the template here.
Note: If reporting multiple contracts, all contracts must be on the same Reporting PeriodReports must be submitted in chronological order. If you have not reported one (or more) contracts included on the Excel file for a previous month, the system will reject the file upload. You will need to report sales for the delinquent months before you can proceed with reporting for the current month.
-
Click the Browse button.
-
Navigate to the location of the sales data file you prepared in Step 1, and select the file to upload.
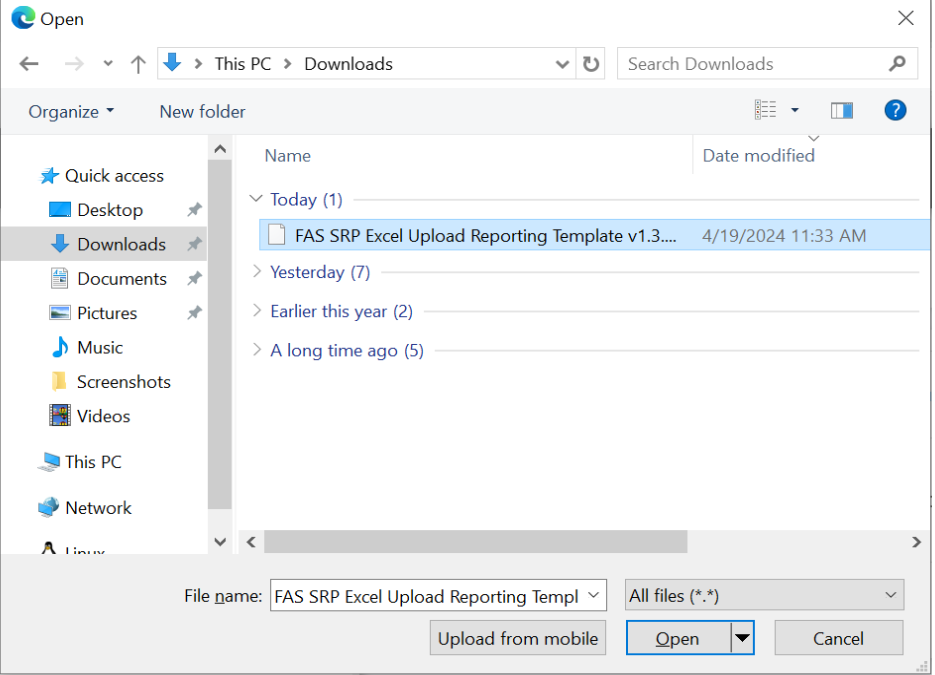
Figure 48: Select File to Upload -
Click Open. The file name will appear in the file upload area.

Figure 49: Upload File -
Click Upload to transmit the data. You will see a message requiring you to confirm the accuracy of your submission.
-
Click the check box to confirm your data, and then click Submit.
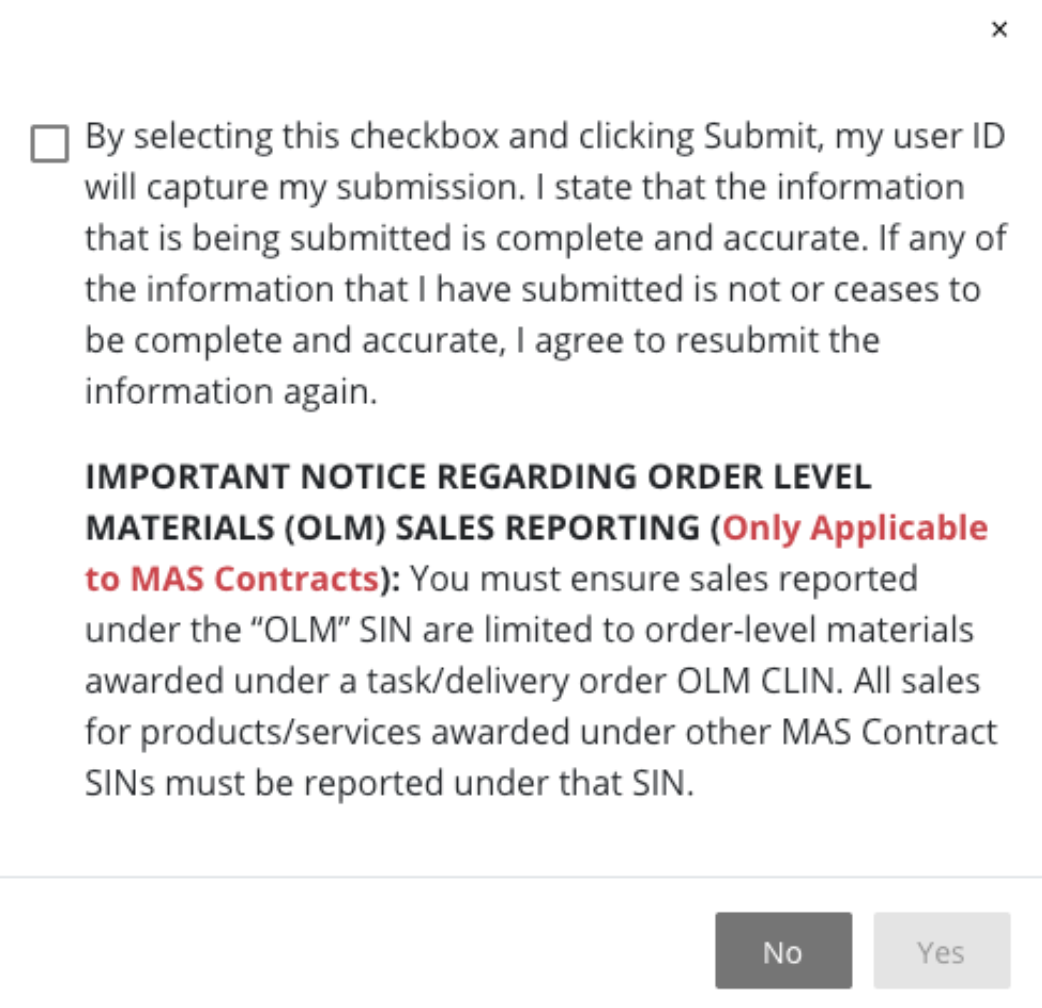
Figure 50: Confirming Your Data -
The System will navigate you to the Contractor home page with updates to the Contract(s). The reporting status will be updated to "Submitted" or "Rejected".
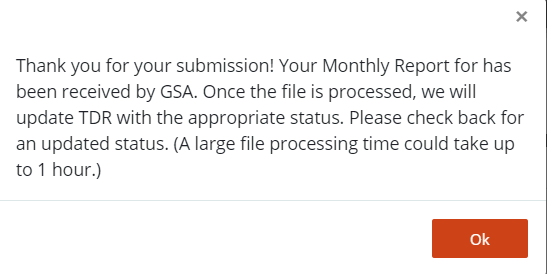
Figure 51: Submission Confirmation If you receive the status of 'Rejected' on your file upload, or an email with your submission status as 'Rejected', go back to the File Upload page to review the reason for rejection. You can then make adjustments to your file to address the data issues, and after you save the updated file, you can try to upload it again.