How to Review Sales and Payment Records using the Search Screen:
Provide inputs in the relevant data fields to set up a search.
Use the Show History or Search buttons to return search results.
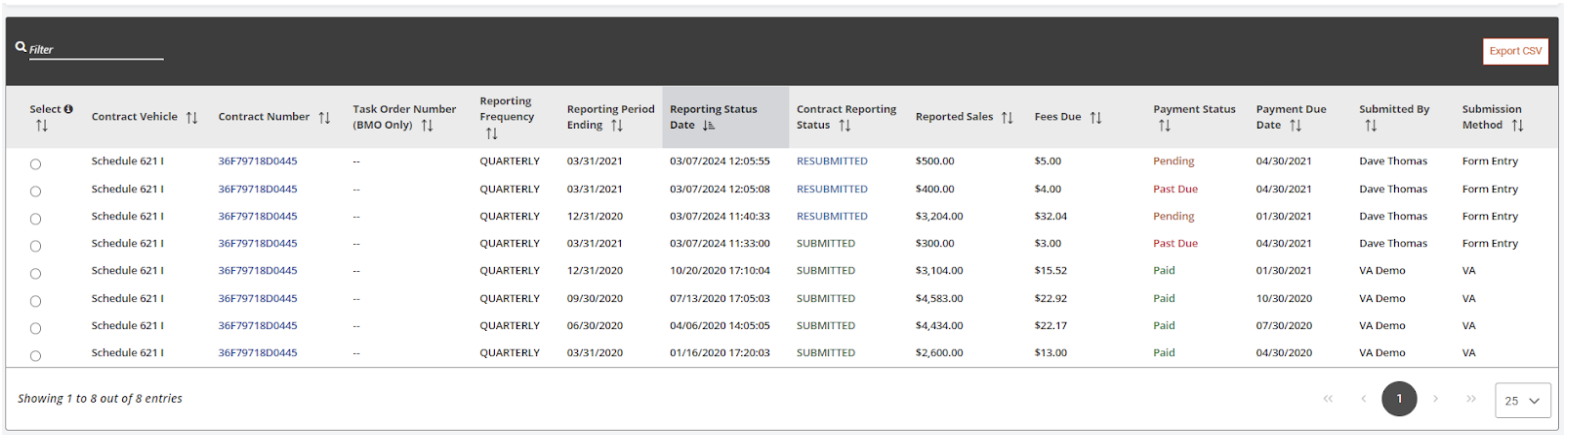
Show History: this option will populate all actions related to a reporting period, and is best used to research or dive deeper into the data. For example, if a reporting period had multiple resubmissions, all submission actions will be returned in the results in multiple rows, all showing the same Reporting Period Ending.Figure 48: Show History
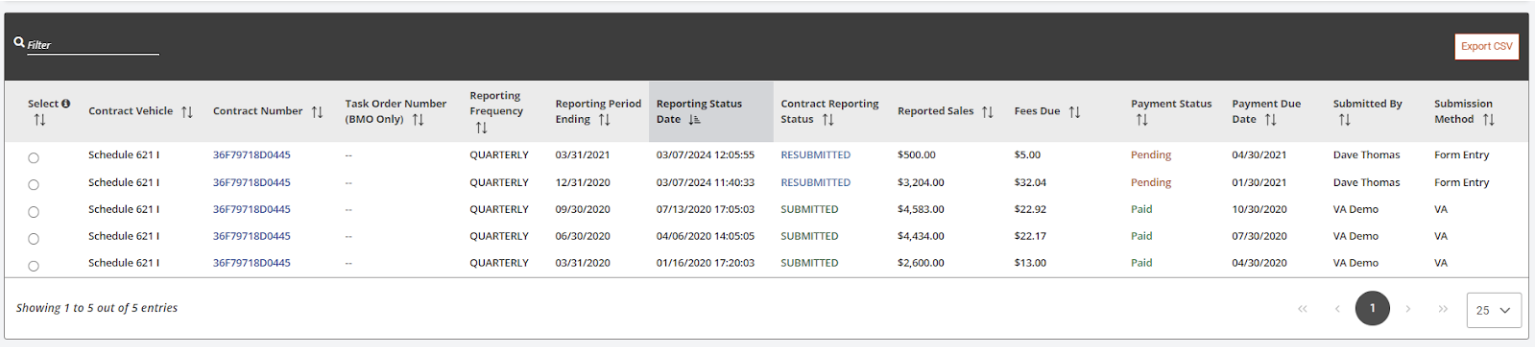
Search: this option will only populate the last action related to the reporting period, and is best used for a quick glance at a reporting period’s status.
Figure 49: Search Screen
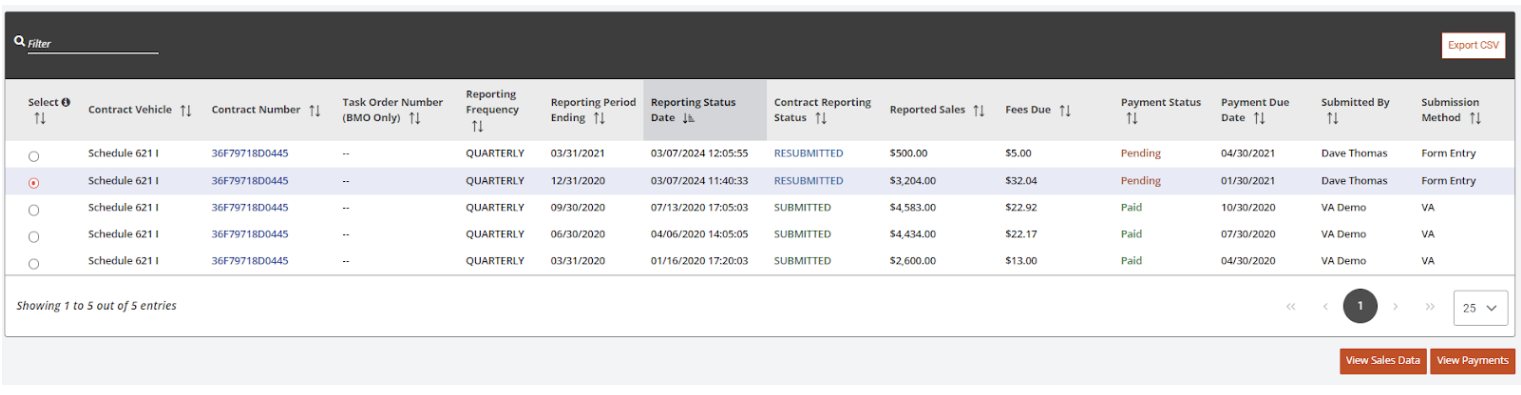
Select the radio button on the left side of the search results table for the record that requires further review. Upon selection of a record, the system will provide two buttons beneath the search results table: View Sales Data and View Payments.
Figure 50: Radio Button - View Sales Data and View Payments
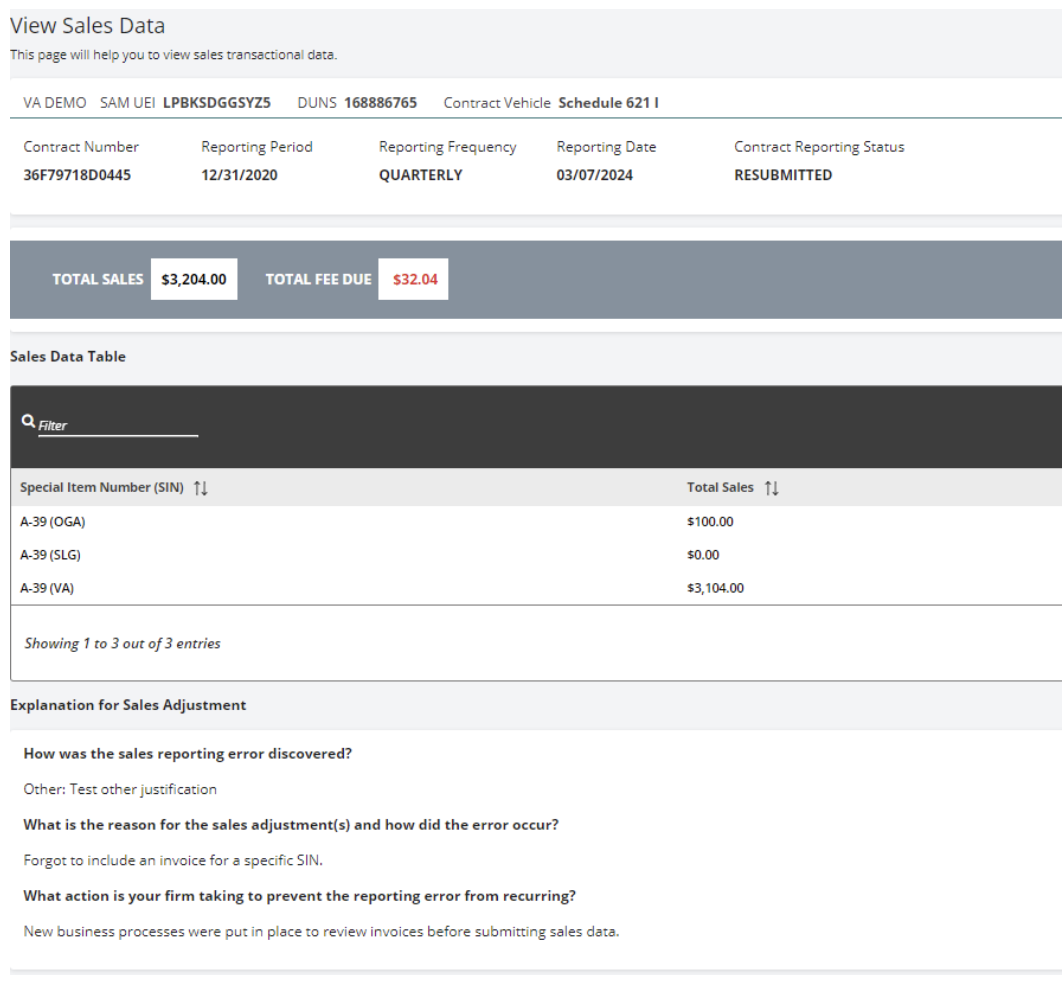
To view the sales data for a chosen record, select the View Sales Data button. The system will redirect to the View Sales Data screen and the sales data may be reviewed in detail.
Figure 51: View Sales Data
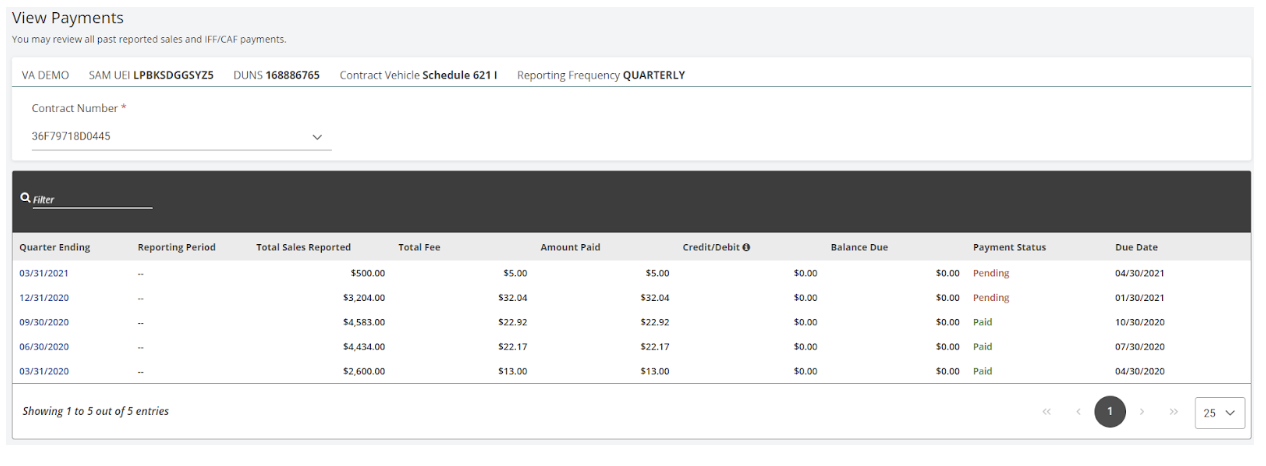
To view the payment data for a chosen record, select the View Payments button. The system will redirect to the View Payments screen and the payment history may be reviewed in detail.
Figure 52: View Payments Data
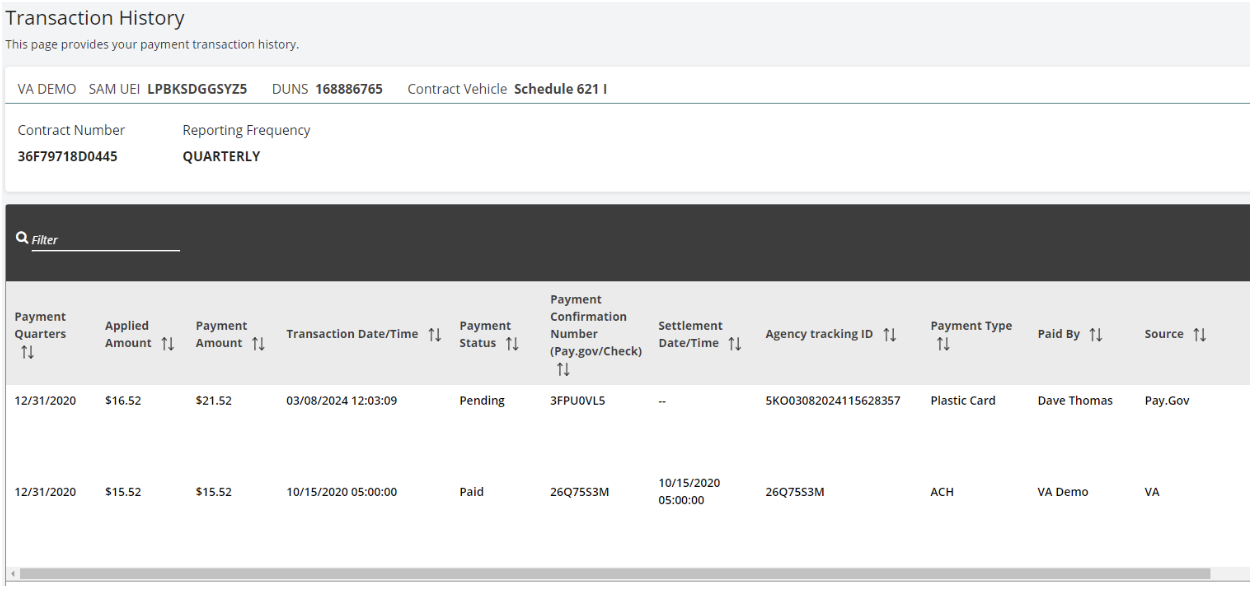
To review detailed transaction history for a payment, select the hyperlinked date within the Quarter Ending column.
Figure 53: Selecting the Hyperlinked DateFigure 54: Review Detailed Transaction History